Thursday, October 29, 2020

Challenge 2 Project

 This is a challenge for Altenew's Educator Certification for Level 2. To get to this level I've taken and passed 10 different courses that highlight different techniques for using Altenew's products. This challenge was to create four masculine cards and to re-pupose something using elements from at least three of the classes at Altenew Academy that I have completed.

The three classes that I have chosen were entitled Let It Shine, Die Cutting, and Embossing, although other techniques from other classes have certainly been used also.

Part 1

The four cards that I have chosen to make are slimline cards that will fit in a number 10 envelope and each opens differently. This is my first attempt at this card size and in some ways you have a little more room but you have to think of your stamps and dies a little differently. None of the products I used were specifically made for slimline cards, but this shows that most stamps and dies can be adapted for this application.


This first card is made with Altenew' SOHCAHTOA stamp set and the Halftone Happy stamp and die set.


 The SOHCAHTOA set is perfect for masculine cards with the graphic triangles and the simple fonts and can be used in so many different ways. I chose to line them up across the length of the card. 


To make this card I used a piece of white cardstock cut to 7.5" x 8.75" and folded in half along the long side. I used Altenew's Permanent Black and Silver Stone ink to stamp the solid and open triangles on a piece of white cardstock that was 2" x 8.75" and then stamped over the black solid triangles with Versamark ink and added Altenew's Rose Gold embossing powder and heat set. For the solid triangles stamped in Silver Stone I added silver embossing powder and heat set. 

Shows base card and top strip

Here are the three main pieces of the card, the black cardstock base that is 4" x 9", the folded white card base, and the black strip with the stamped strip attached.

The black cardstock that is 3" x 8.75"and I slid the Versamark pad lightly across both long edges of this and added the Rose Gold embossing powder and heat set. This black strip was affixed to the card base and the stamped and embossed white strip was centered over it as shown.


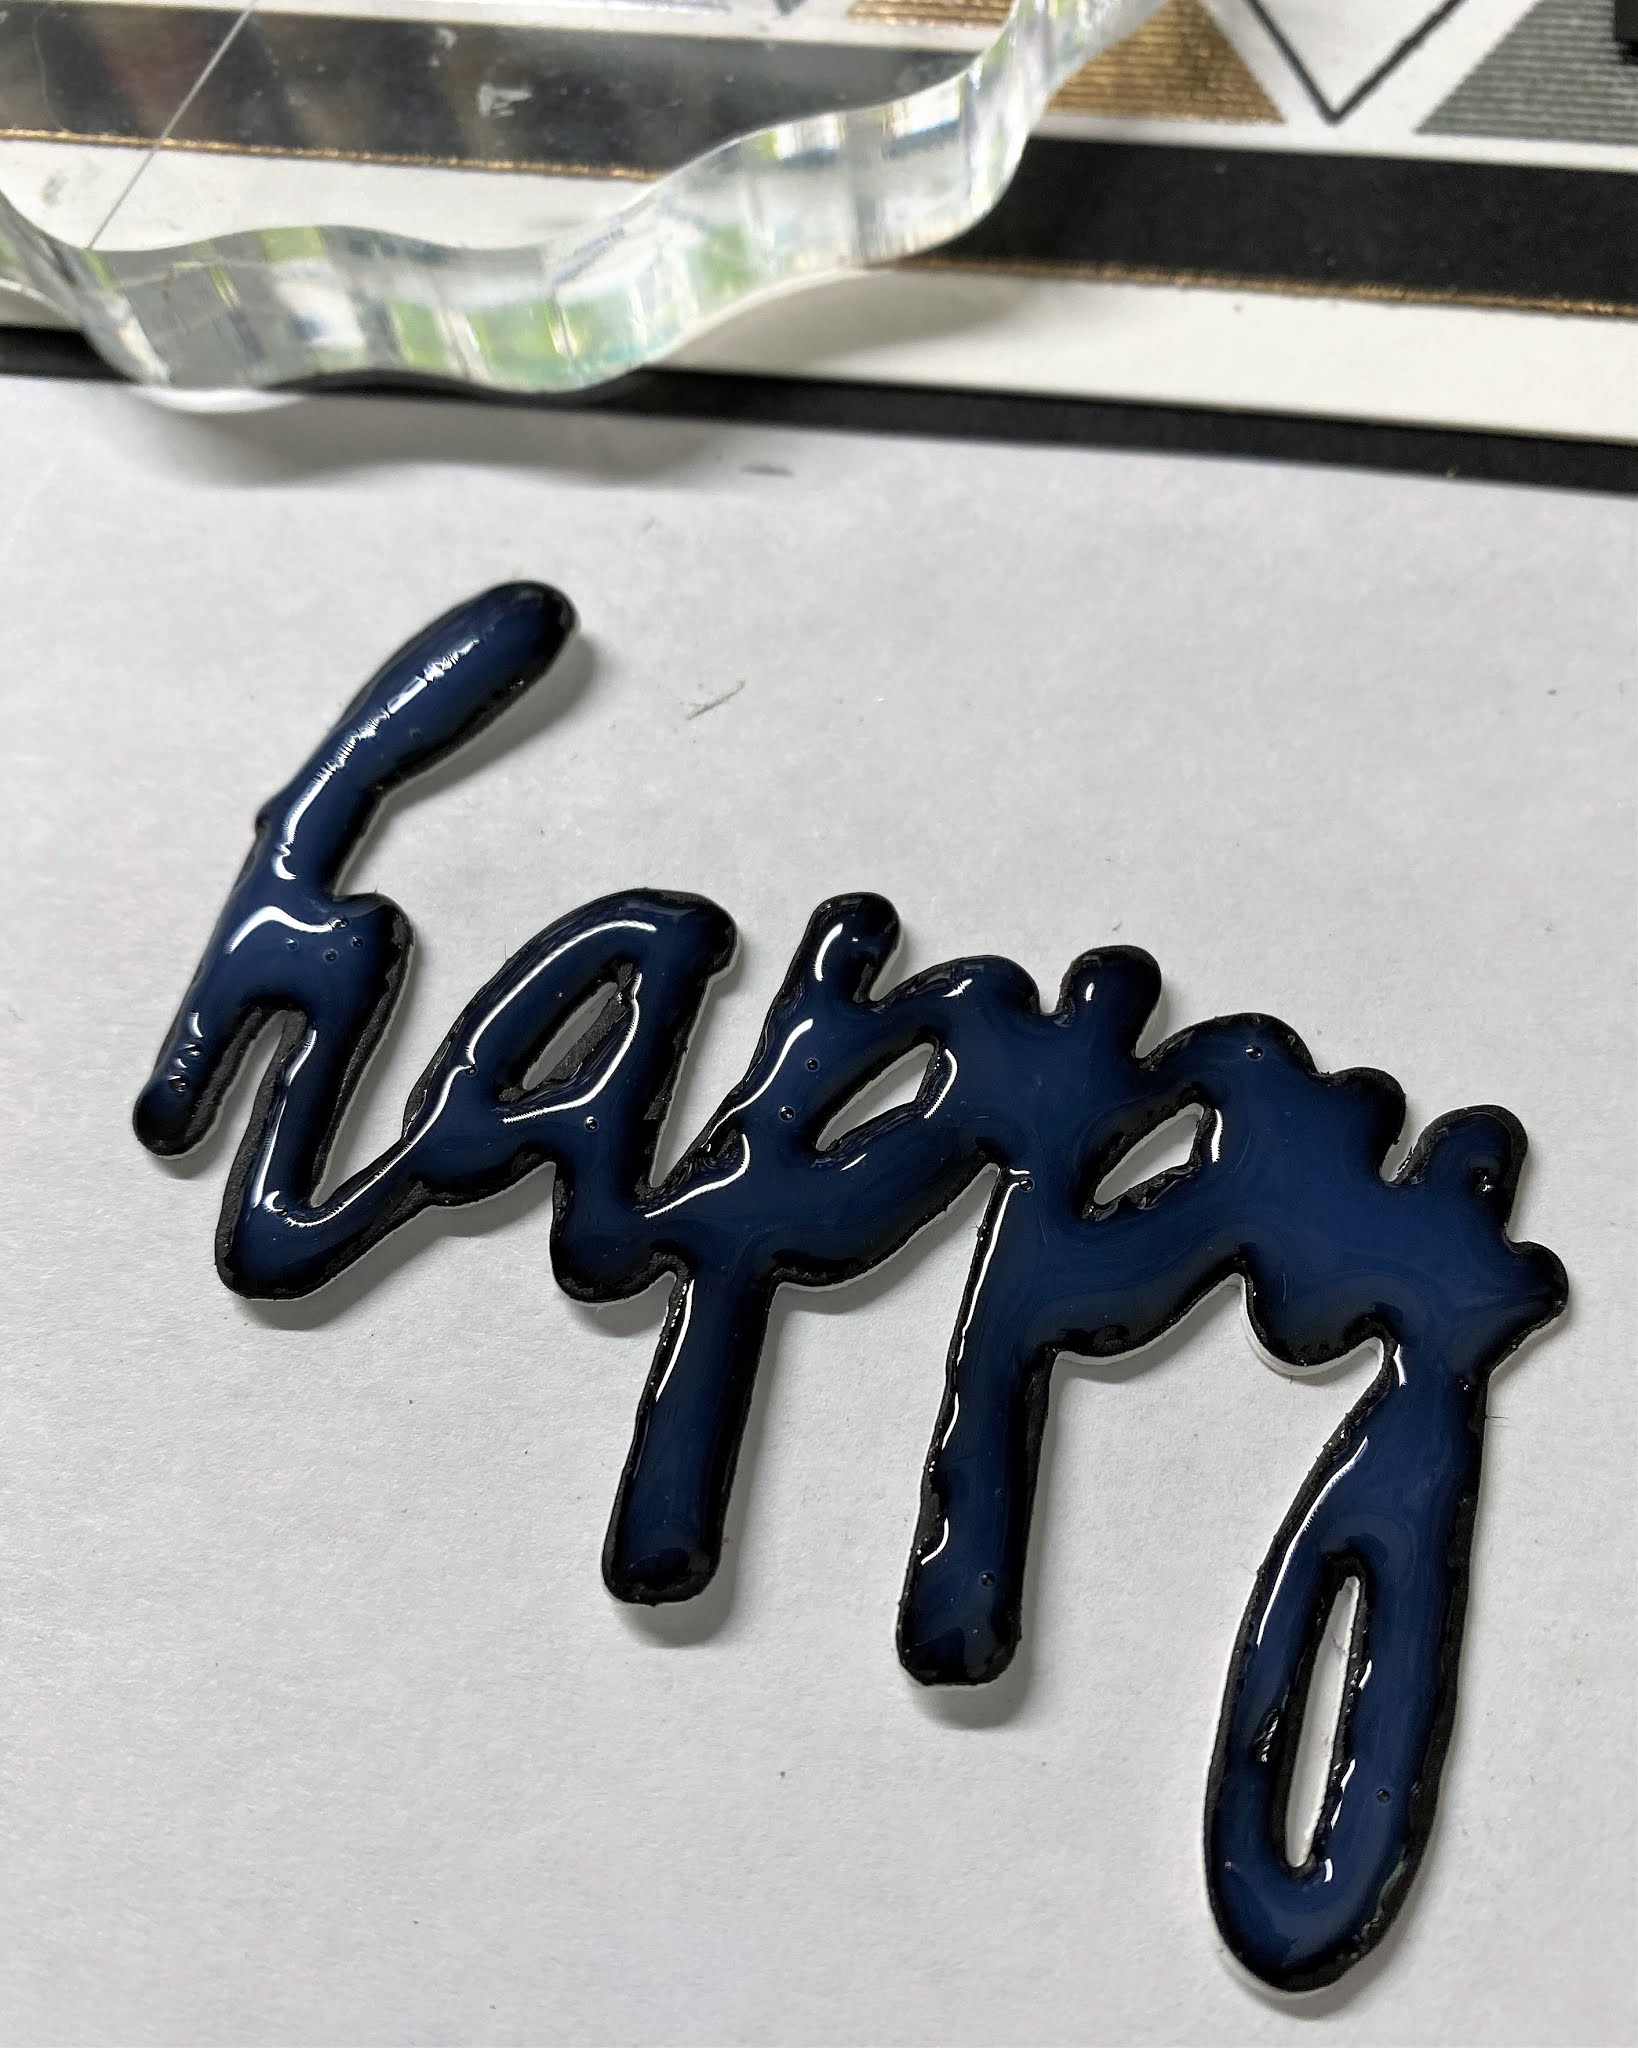
I die cut the "happy" from black cardstock twice and once from white cardstock and layered them together with the white on the bottom and the two black ones on top. I affixed this to the card front and added Glossy Accents over the die cut for shine.


The "anniversary" was embossed with the Rose Gold embossing powder and added to the card with two pieces of black cardstock behind it to make it pop up slightly.

Finally, the white card base that was assembled was affixed to the piece of black cardstock that was cut to 4" x 9" and this is the finished card:


The second card uses Altenew's Plaid cover dies, and even though they are meant for an A2 (4.25" x 5.5") you can make them work for a slimline, as you will see. First here is the finished card and then I will explain how it was made:

As you can see, this card opens differently and the leaves make it a type of gate-fold card. (The base was white and does not show well in the photo!) Here is what it looks like closed:

First I used an embossing mat with my die cutting machine and Altenew's Plaid cover die A and made an impression on two pieces of black cardstock. The cardstock was cut to 4.25" x 5.5" to fit the die. The advantage of this is that you can get the impression and see the details without the added bulk. 

I also cut two pieces of metallic bronze cardstock with Altenew's Plaid cover die B:


I glued the bronze pieces over the black pieces, even though both needed to be trimmed as they would be too long for the length of the card.


I trimmed them both to 4" x 4.5":

Both needed 1/8" cut from both long edges and the one that was going on the left flap of the card was cut on the right-short side and the one that was going on the right flap of the card was cut on the left edge. This keeps the A cover die the same on both of the folded edges of the card.


As you can see from the above picture the left and right sides are the same as they will show on the outside of the card and both long edges were trimmed the same amount.

To make the card base I used white cardstock, one piece cut to 4" x 9" and two others cut to 4" x 5". The two smaller ones were both scored 1" from one 4" edge to make a flap that would be glued to the back of the long piece. A tip is to snip a bit of cardstock off the edges of the flaps so they don't show from the front of the card.

Once the above trimmed card front sections were clued to the front of each flap I added a 4" x 1" piece of metalic bronze cardstock to the edge of the left flap. 

To make the leaf decorations on the left flap I used Altenew's Grape Leaves die set to cut the solid images from metallic copper cardstock and then the detail of the veins from the metallic bronze cardstock.

Again, I used Altenew's Halftone Happy die and stamp set for the greetings. I cut the "happy" from one layer of metallic gold cardstock and one layer of metallic copper cardstock, glued them together and added to the front. The other sentiments were embossed with gold embossing powder on black cardstock and added to a small piece of metallic copper cardstock. I added foam tape to the back to add dimension to both of them.


The third card is also a slimline using Altenew's Plaid cover die B and Altenew's Leaf Mix die set.

The card base is a piece of metallic copper cardstock cut to 4" x 9" and the card is a piece of kraft cardstock cut to 7" x 8.75", and folded in half so that it is 3.5" x 8.75".

 This is the only vertical slimline in the set and I just love the options this Leaf Mix set gives.


 I cut some of the solid leaf shapes from the metallic bronze cardstock and some from the metallic copper cardstock. I cut the detailed dies from the same but mixed them up so that a copper was glued on top of a bronze and a bronze was glued on top of a copper.

Again, the cover die cut needed to be adjusted to fit the front, but it's not difficult! I cut two of the Plaid cover die B from black cardstock and cut just the short edge off one of them. Then I positioned them on the front of the kraft card front to line them up to make a continuous plaid design across the front of the card.


As you can see, some of the die hangs over the edge of the card, but will be trimmed off.


Once I was happy with the positon of the die cuts, I glued them down and trimmed off the excess.

Then I affixed the card to the metallic copper cardstock.


I added a thin piece of copper metallic cord over the card front and positioned the leaves cascading down along the cord. I stamped the verse from Altenew's Best Sentiments stamp set with Altenew's Permanent Black ink onto a piece of kraft cardstock and mounted it onto a small piece of the copper cardstock and added it to the front with foam tape.

Here's the final card:

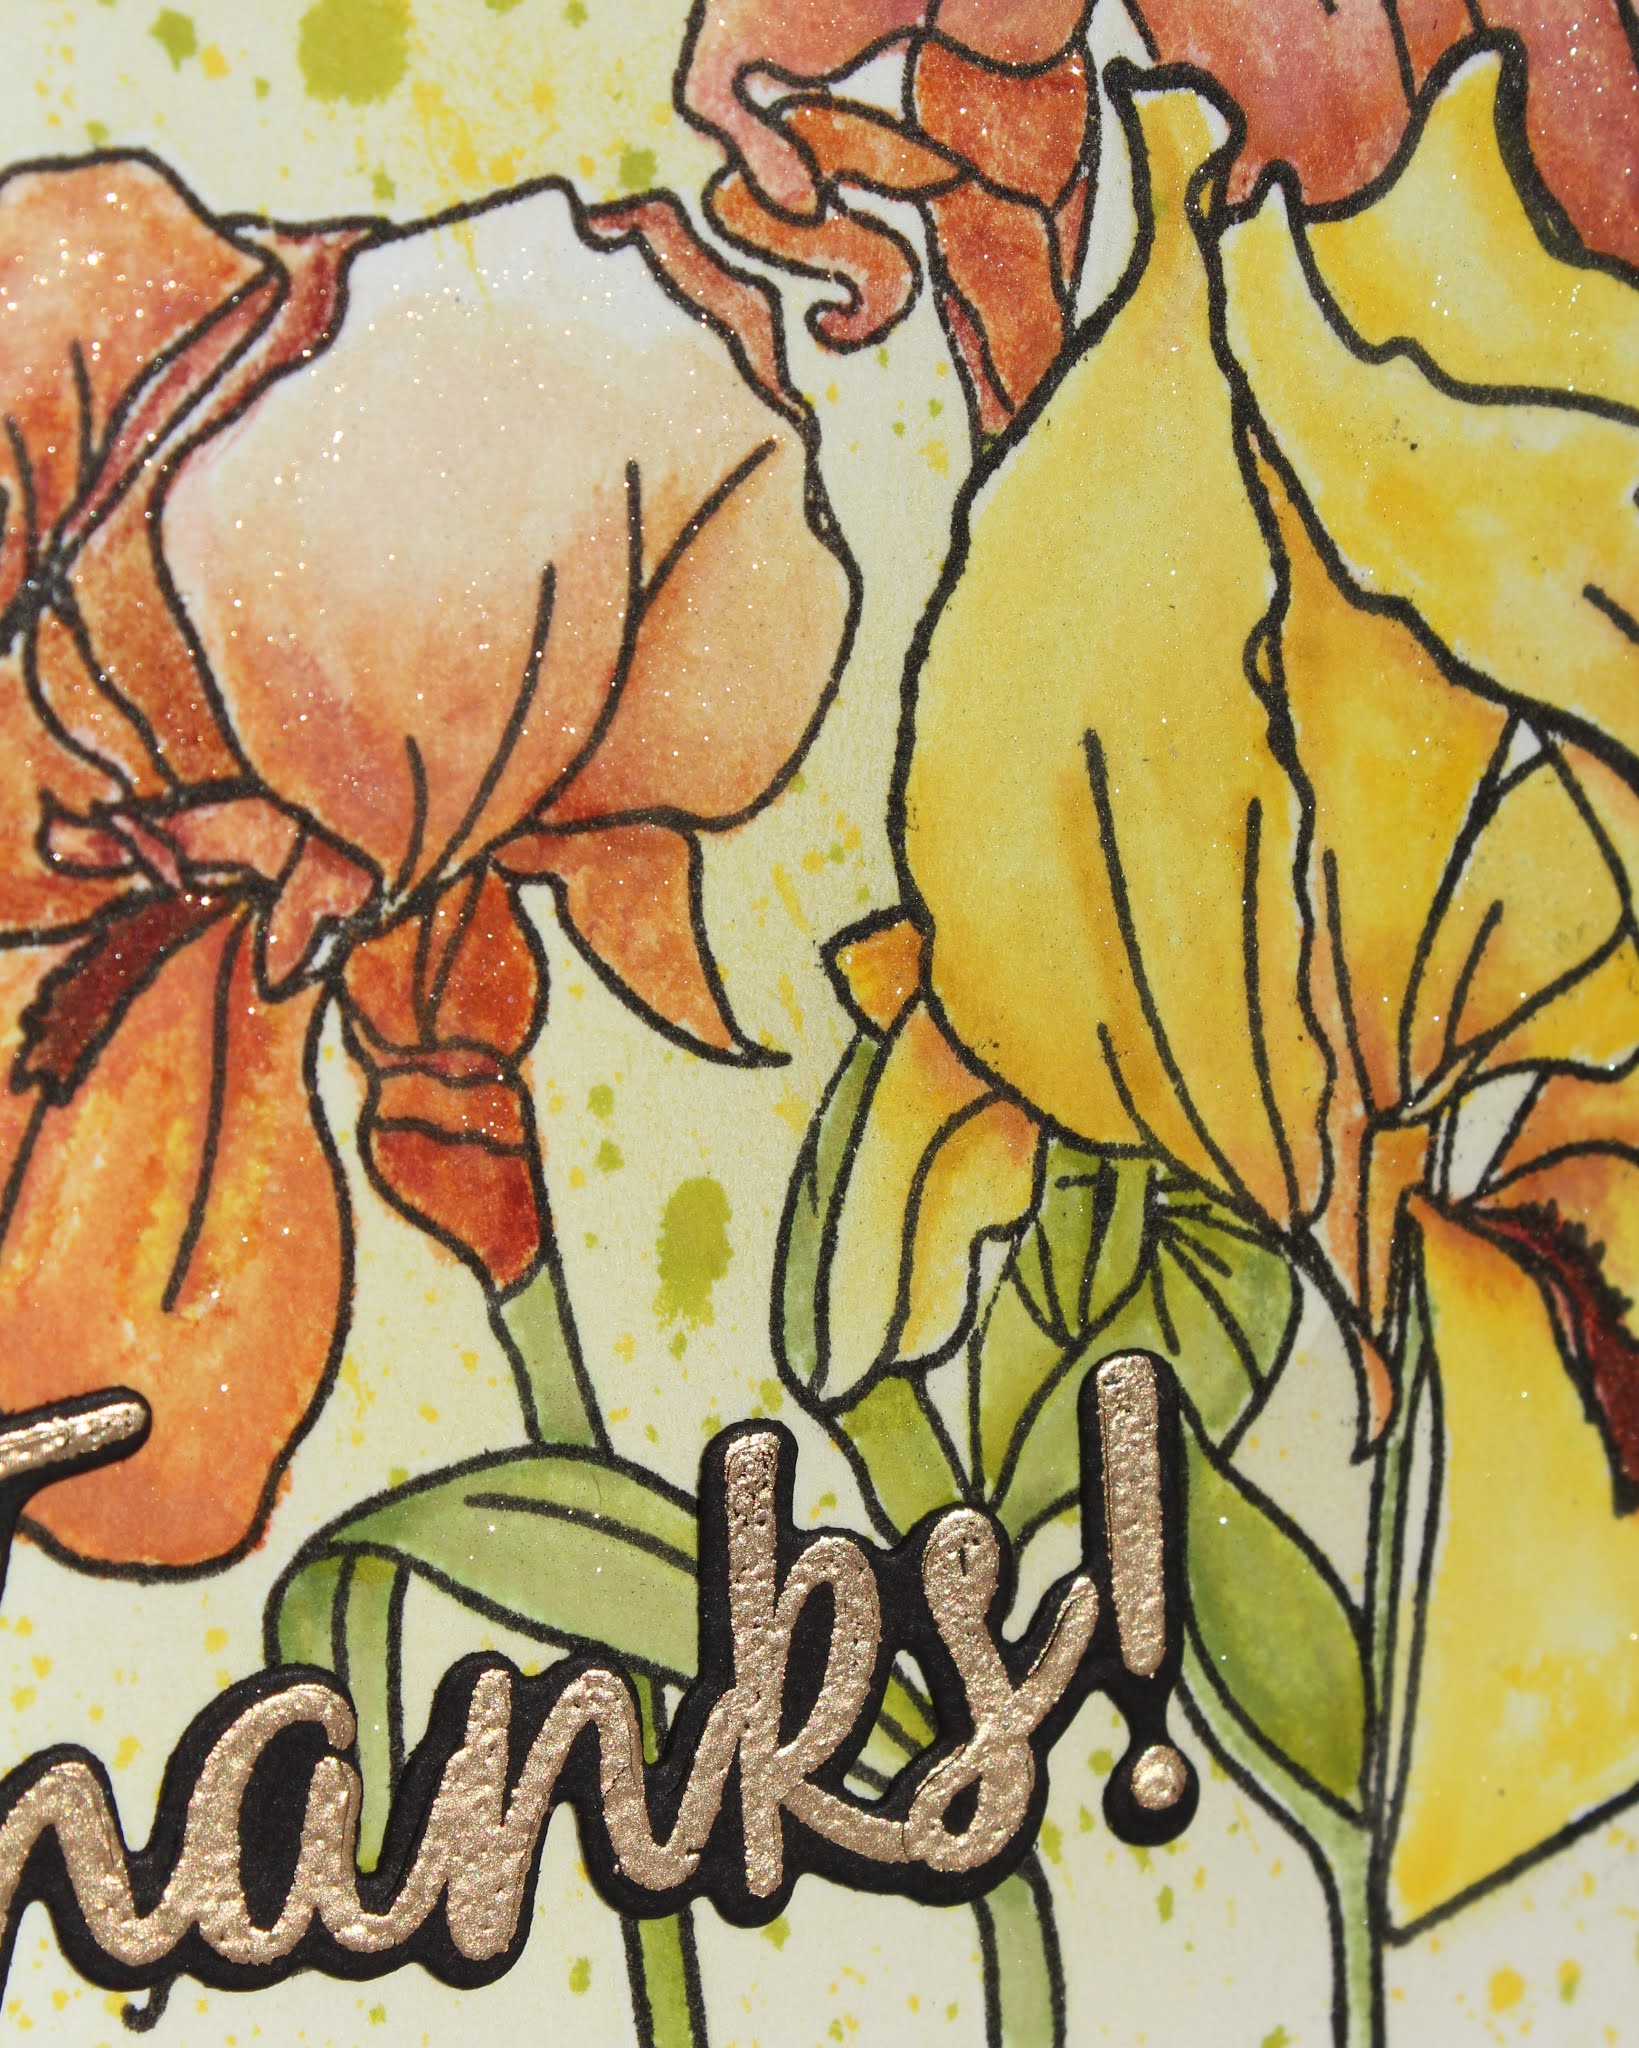
For the final slimline card, I guess I had enough of black, after all, men like color too! Again, I used Altenew's Grape Leaves stamp and die set, and Altenew's Simple Hello die. I also used Altenew's Plaid cover die B differently for this card, and I hope you see how versatile these dies are!

For the card I used a piece of Olive cardstock cut to 4" x 9" and a piece of vanilla cardstock that was cut to 7" x 8.5". Both of the 8.75" edged of the vanilla cardstock were scored 1.75" from the edge to make a center-opening gate fold. 

I stamped the outline of 3 grape leaves with Versamark and embossed them with gold embossing powder. Then I used Altenew's Caramel Toffee, Autumn Blaze, and Olive ink with small applicator to sponge in the colors so the leaves would have a fall look.


Once they were colored in, I used the matching dies to cut them out.


To add interest to the front of the card, I cut Altenew's Plaid cover die B from cardstock and used it as a stencil to add color to the front of the card. Folding both of the flaps down and adding a little low-tack tape to hold them down, I applied Distress Oxide ink in Brushed Corduroy over the front, repositioning the "stencil" so that it lined up and inking the other side.

Once I was happy with the added color,the piece was glued to the center of the olive cardstock and I added a gold cord, curling like grape tendrils across the top section of the card and added the leaves, using foam tape on two and gluing one flat to the card. The gold cord does hang down on the lower flap, but it is not glued down. When doing this and having them hang over the edge, be careful to only add glue or foam tape to the part of the leaf that will be overlap the top fold of the card so you don't inadvertently glue the card shut.

Gold cardstock was used to cut the hello and only the top of the letters were glued to the bottom edge of the top flap. I stamped the "how are you?" with Altenew's Permanent Black ink on a piece of olive cardstock and added it to the bottom flap as shown.

I hope you found some inspiration for using dies in different ways, adding shine to your cards not only with embossing powder, but with metallic cardstock and metallic cording and learned that you can use the materials you might already have for different types of cards.

Part 2

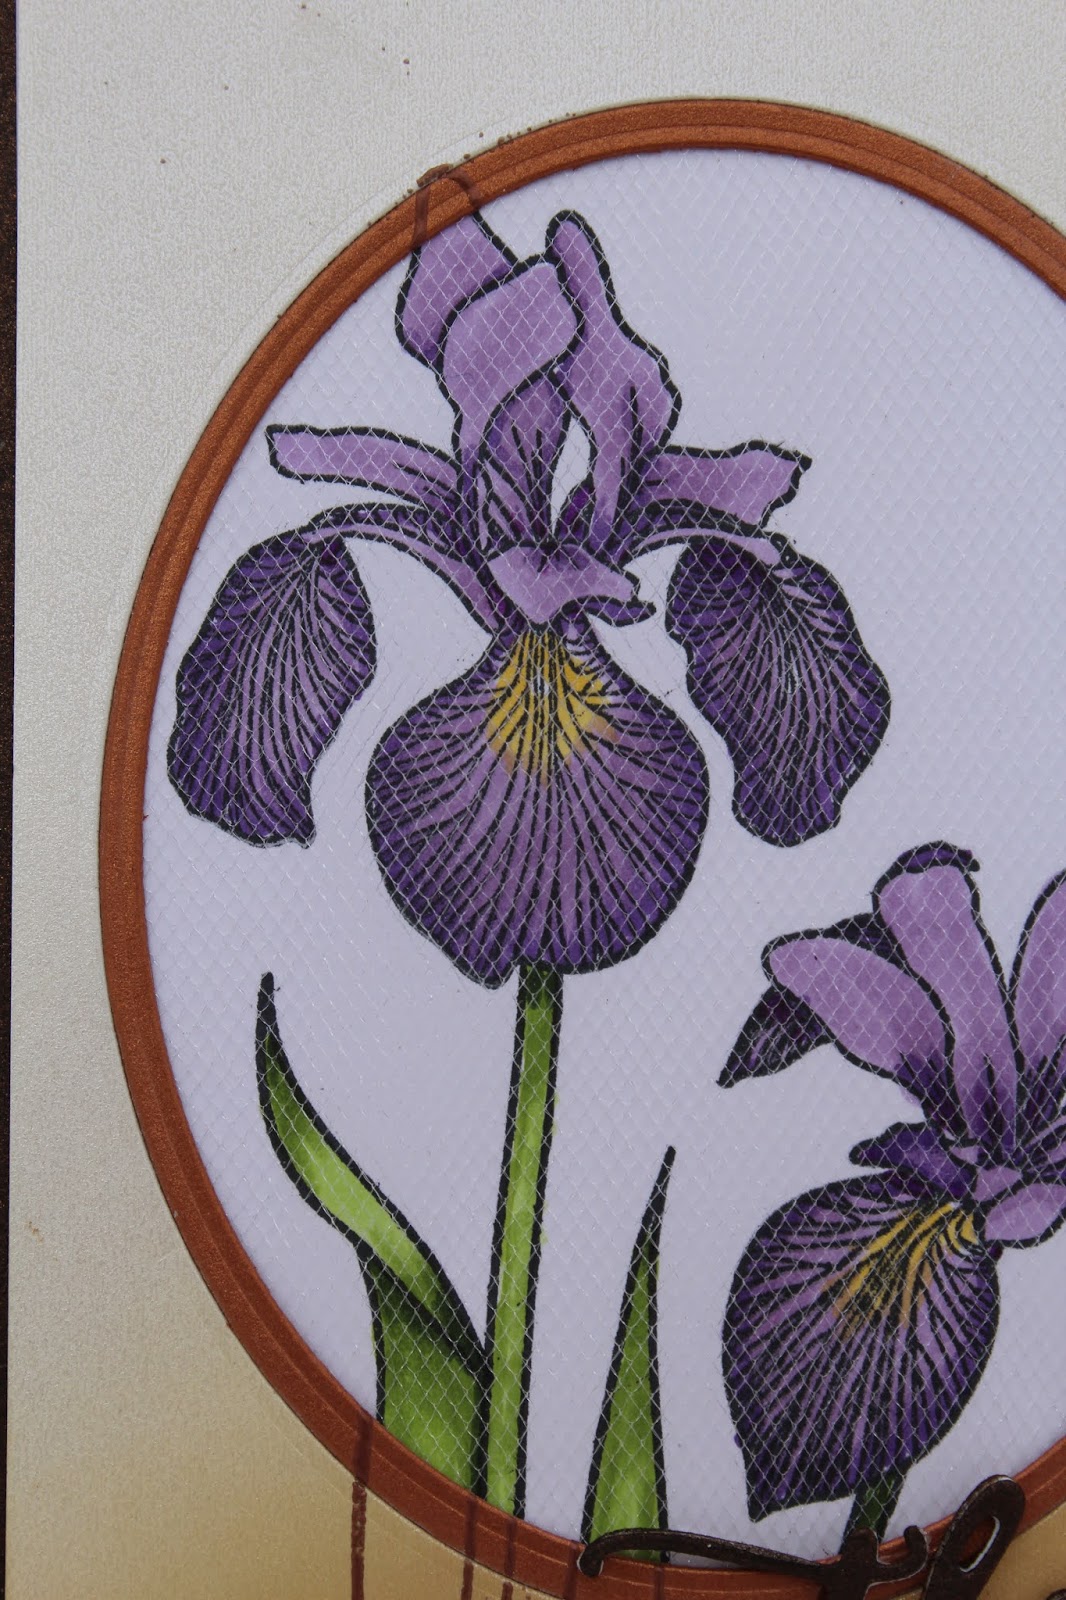
Now, the repurposed project part of this challenge is the one that took longer for me than the cards and I really struggled with this as I bounced many ideas around. Many years ago my mother handed me four quilt tops that my grandmother made. Both my mother and grandmother have been gone for years so I really wanted to finish these. Three of these were hand stitched and the fabrics were worn and very fragile. One I took to a professional quilter and gave it to one of my brothers, I quilted two of them, one for me and one for my other brother. The last of the bunch was a silk necktie quilt that my grandmother made out of my grandfather's ties. Old silk ties don't keep well.  And this photo will show you what this quilt top looked like when I recently pulled it out of storage:

Although this quilt top was rather large, I had to cut it down to  23" x 46". The process I am sharing in a video as the project took so long and I wanted you to see the entire process. 

I used Altenew's Grape Leaves stamps and die set and although I forgot to mention in the video what I stamped the leaves with, they were stamped with Altenew's Permanent Black ink. This is the final result:


The process that I used for the above quilted wall hanging and close up shots of the stitching I've included in this short video. 


Wednesday, August 19, 2020

Masking Unleashed

Masking is one of those techniques that helps you stretch your stamps because it gives you more design possibilities. In Altenew Academy's Masking Unleashed class you would learn many techniques for masking off images and you are introduced to all of the different products you can use to mask. For this example I used Altenew's Paint a Flower Iris and both images in the set were used.

 I stamped the yellow iris on Post-It tape, which is great for smaller or narrow images. After cutting it out along the lines the mask was complete, and I was ready to stamp.

I stamped the yellow iris in Versafine black ink on watercolor paper. Then I placed the mask over the image and stamped the other two irises over top. After removing the mask I watercolored the images using the ink from stamp pads. I used Altenew's Crisp Dye ink in Frayed Leaf, Forrest Glade, Olive for the greens. For the yellow iris I used Caramel Toffee, Fresh Lemon, and Maple Yellow. I was trying to get the bronze color for the other two irises but they turned out rather pinkish-orange. I used Caramel Toffee with Distress Ink in Rusty Hinge and Aged Mahogany. I used a brown Wink of Stella for the beards on both irises. Then I used a clear Wink of Stella to go over the petals, stems and leaves.

Masking is also  useful for backgrounds, which always frustrate me after spending so much time painting an image as with watercolors it's done last. So I stamped the larger double iris stamp on some masking paper and cut another mask. I layered both masks over the flowers so they did not get splattered and I splattered Fresh Lemon and Olive ink over the background. I used a stitched rectangle die to cut the image out and mounted it on a dark olive piece of cardstock with a piece of foam under for dimension.

I stamped the "Thanks!" from Altenew's Halftone Circle stamp set in Versamark on black cardstock, added Altenew's Rose Gold embossing powder, and heat set. I used the matching die to cut the word out and glued it to the front of the card.

Finally, I added the entire piece to the front of an A2 top-folding cardstock. Thanks for looking and I would encourage you to try masking images to make more designs with your stamps.


Saturday, August 8, 2020

Quilting With Stamps?

 This small quilt was made with left-over fabrics from quilts I've made and I wanted to experiment with alcohol markers on fabric.

One a piece of cream cotton fabric I stamped Altenew's Paeonia Japonica stamp with Ranger's Jet Black Archival ink. I colored the image with Altenew's artist markers in Soft Lilac, Lavender Fields, Deep Iris, Frayed Leaf, Forest Glade, Evergreen, and Warm Sunshine. 

I quilted the piece and then added tiny black seed beads to the center of the blooms. I was wondering if the markers would "bleed" across the fabric threads, but they did not and so I was quite happy with it.


This shows you can use your stamps in other ways besides cards! I am entering this into Altenew's August Sewing Contest. Hope you  like it!


Monday, July 27, 2020

Magical Marker Techniques

What's that saying about old dogs, new tricks? Learning new tricks with your stamping supplies is valuable as it stretches not only your supplies but also your wallet. In Altenew Academy's Magical Marker Techniques course I learned that there are more ways to use alcohol markers than just for coloring. I really liked the brayering technique for making backgrounds as it gives a more "organic" look to the backgrounds.
For the background of this card I used Altenew's Artist Marker in  Evergreen and a brayer on white cardstock. To add a little more interest I stamped the tiny leaves from Altenew's Ornamental Flower set in a random pattern in Altenew's Frayed Leaf dye ink. The dark Evergreen is lighter when brayering it over the background and the lighter Frayed Leaf ink matched well.
The flower and leaves are from Altenew's Ornamental Flower set and were stamped in Altenew's Crisp Dye inks in Sea Glass, Ocean Waves, Dusk, Desert Night, Frayed Leaf, Forest Glades, Evergreen, Fresh Lemon, Honey Drizzle, Orange Cream, and Autumn Blaze. If there were any missed edges from the layers I was able to touch them up with the Artist Markers in the same color. These markers match the dye inks so well that you can add more details after stamping the layers if desired. After stamping them I cut them out with the matching dies. The sentiment is from Altenew's Halftone Circle set and was stamped with Jet Black, also from Altenew.

The pearls were white but colored with Artist Markers in Desert Night and Dusk.
To put the card together I added the background to a piece of dark blue cardstock, added a strip of the blue with a layer of white across the card. I positioned the leaves and flower so that I could see where to stamp the sentiment and after stamping that, added the leaves flat and added foam tape to the back of the flower. Then added the pearls for the final touch.

Thanks for looking and I hope you can find new ways to use your markers!

Saturday, July 25, 2020

Impressive Heat Embossing

Hello again, and welcome back! Today's course was all about heat embossing. Heat embossing gives cards the "Wow!" effect and every time a new stamper sees it done they fall in love with it. There are some tricks and if you take Altenew Academy's Impressive Heat Embossing course you would learn more ways to use embossing powders.

In the past I've used heat embossing to do simple sentiments, metalic-look tags, cracked glass, and even made jewelry. There's so much you can do with a heat tool and embossing powders, but the technique I chose to do on this card was to heat emboss with layering stamps. This took some practice as it isn't something I've done before but it does help you look at your layering stamps in a new way.

This card uses layers of heat embossing done with Altenew's Angelique Motifs stamp set.


The Process:


The embossing was done with Versamark ink for all layers, using an anti-static pad between each layer. I used white, silver, clear, and a mixture of clear with teal glitter. I made this  mixture myself as I didn't have the color of glitter embossing powder that I wanted to use.

For the background I stamped the largest leaf spray twice on white cardstock, one stamped only once with Altenew's Crisp dye ink in Dew Drops and the second one stamped twice with the same color. I then stamped over the images with Versamark ink and used clear embossing powder and heat set. This made the leaves glossy. Then I took the third layer, skipping the second layer stamp, and stamped over top of the leaves with the Versamark and added the teal-glitter mixture and heat set. I used a blending brush to add a light touch of Dew Drops ink around the leaves and then wiped off the embossed areas with a clean towel. The piece was cut out with a stitched rectangle die.

I also cut another rectangle with the next larger stitched rectangle die out of an aqua cardstock and placed the stamped background onto this. They were both attached to the front of a white card base.

The flowers in this stamp set have three layers for the petals and more for the centers, and for some of them I did not use all the layers.

One of the smaller flowers was stamped on white cardstock with Dew Drops ink with the first layer of the stamp and then clear embossed over. The second layer of the stamp was embossed in white and the center was embossed with the teal-glitter mixture. It was cut with the matching die and glued down to the card front flat.

The largest flower was stamped on white cardstock and the first layer was embossed with white, skipping the second layer stamp, embossing the third layer with silver, and the center layer with the teal-glitter mixture. I cut this out with the matching die, and also cut a piece of foam with the matching die and glued them together.


The other smaller flower was stamped on vellum. To give the vellum some color I stamped the first layer with Dew Drops ink, and then embossed over it with clear embossing powder. The second layer was stamped and embossed with white. The third layer was stamped and embossed in silver. Finally, the center was stamped and embossed with the teal-glitter mixture. This flower was added to the card front with foam tape.

The sentiment is from Altenew's Heartfelt Sentiments and was embossed on the aqua cardstock in white and foam tape was added for dimension.

As a final touch, rhinestones were added.

A tip I would like to share when working with embossing layers with photopolymer stamps is to clean the stamps on both sides to get good impressions with every stamping as the anti-static powder will start sticking to the stamp and will leave tiny areas on the stamps that will not make a good impression. If the back side of the stamp gets too much powder on it, it will not stick to the acrylic block or the door of the Misti well. These stamps are sticky so I usually take them all to a sink and wash them off well so that there is no powder left on either side of them. (Be sure to put the stopper in the sink!) I hope this helps!

Wednesday, July 22, 2020

Color Your Day

Not being an art student, one thing I struggle with is using a color wheel and how to mix and use colors. Altenew Academy's Color Your Day class was perfect for me and really helped me with this. Since I'm a retired high school math teacher, having a "formula" for how much color to use made perfect sense to me! Don't worry, you don't need a degree to figure this one out, as it's simple percentages, which I applied to this card.

 The Process:

Starting with a piece of champagne metallic cardstock, I blended inks in a diagonal from the bottom right corner toward the center. I used Distress Oxide inks in Antique Paper, Brushed Corduroy, and Vintage Photo.

I used a set of nesting oval dies and cut the larger oval out and then with the next smaller I made a frame to fit inside the larger oval with a metallic copper cardstock. I treated this with an anti-static pad as I was planning to emboss on it.

Using the Misti I positioned Altenew's Enchanted Iris stamps on the frame and inked them with Versamark ink and used copper embossing powder to emboss on the metallic frame. I also embossed the butterfly from Altenew's Painted Butterflies in the top-right corner. To get that one leaf on the far left edge I had to mask off the stem and stamp it separately to be behind the stem.

Once the frame was embossed I placed a piece of white cardstock in the Misti in the same position and stamped the irises and leaves with Momento Tuxedo Black ink so I could color them with alcohol markers. I colored them with Altenew's Artist Markers in Lavender Fields, Deep Iris, Mango Smoothie, Frayed Leaf, Forrest Glade, and Emerald.


From the back side of the frame, I affixed a piece of shimmery tulle fabric over the oval hole in the frame and positioned it over the colored image so that the embossed lines of the frame lined up with the image. The tulle has a slight bit of sparkle and gives the entire image a little shine.

I've used this instead of acetate for shaker cards and it doesn't give the glare that you sometimes get with acetate.


The sentiment is from the matching die set and was cut from bronze metallic cardstock and popped up by cutting it from foam also. The tip in the class for doing this was invaluable! The "for everything" is also from the Enchanted Iris set and was stamped with Versafine Black Onyx.

The entire piece was glued to a piece of bronze metallic cardstock and added to a white top-folding note card. Thanks for looking and I hope you had a color inspiration!


Tuesday, July 21, 2020

Beautiful Details

Sometimes it's nice to do a plain and simple card but the details we add to cards make them unique and the receiver will notice those extra special touches and know that you cared enough to add them. If you were to take Altenew Academy's Beautiful Details class you would learn lots of ways to add your own one-of-a-kind touches.


Altenew's Peony Bouquet stamp set has become one of my favorite sets and the floral images come out so beautiful by stamping the layers as they are intended, but I wanted to add a little extra shading and details for this card. This card needed a special background to set the peony images off so I started with a piece of vellum cardstock.

After treating the vellum with an anti-static pad I stamped two images from Altenew's Golden Garden stamp set with Versamark ink and used clear embossing powder. I have to admit I colored with several different markers and pencils to get these images to look how I wanted them to. It's true that my coloring always looks worse before it gets better and I learned to stick with it from this course!

I used a combination of Altenew's Artist markers in warm gray shades (WG01, WG03, WG05, and WG07), Faber-Castell Polychromos pencils in Warm Gray II and Warm Gray V, and a Tombow marker color N79 to color the vellum leaves and flower.


I stamped the leaf outlines from Altenew's Peony Bouquet with Distress Ink in Frayed Burlap and blended over it with Altenew's Artist markers in the warm gray colors above. I cut them out with the matching dies.

For the peony blooms I stamped the three layers with Altenew's Crisp Dye ink in Warm Sunshine, Orange Cream, and Autumn Blaze. To add more detail I used Faber-Castell Polychromos pencils in Pompeian Red and Middle Cadmium Red.


After adhering the vellum piece to a white card base I added an orange cardstock strip with a stitched edge along the fold edge. For a base for the flowers I cut a piece of white cardstock with a stitched square die, trimmed off a corner and mounted it with foam to the card with the cut edge along the fold. I glued down the leaves and the smaller bloom to the stitched square and added the larger bloom with foam.

The sentiment is stamped with Versafine Onyx Black ink and is from Altenew's Heartfelt Sentiments stamp set. For a final touch I added pearls in soft peach from Little Things from Lucy's Cards. Thanks for looking and I hope you found some inspiration to add some little details to your special cards.